
The role of clips in horseshoeing — an expert, practical synopsis
Helbert Barion CJF., San Paulo, Brazil & HoofFlix.CoM.
Clips are one of the simplest but most powerful tools a farrier has to stabilise a shoe on the hoof. Used intelligently they protect the horn, reduce nail stress, control shoe migration and help manage break-over and mediolateral stability. Used poorly they can concentrate stress in a compromised hoof wall, catch on ground or tack, or give a false sense of security that masks poor trimming or shoe fit. Below I set out how clips work, the advantages and disadvantages of the common clip types, the practical choices around fitting them laid on the hoof wall versus cut in (flush), and a considered, pragmatic approach to choosing clips according to hoof conformation, function, shoeing cycle and intended work regime.
How clips work (simple biomechanics)
A clip is an extension of the shoe flange that is bent up and shaped to engage the hoof wall between the nails at the toe or quarters. Mechanically it:
Resists shear forces that try to pull or slide the shoe relative to the wall (the main mechanism by which shoes “gap” or migrate).
Redirects load away from the nails and nail holes — the clip takes compressive shear so the nails are less likely to loosen, bend or tear the wall.
Increases rotational stability at break-over when placed at the toe or heel quarters, depending on position.
Provides a mechanical index point for positioning the shoe consistently each cycle (useful for corrective shoeing).
In short: clips change the way forces transfer between shoe and hoof — from concentrated tensile loads on nails to compressive/shear loads at the clip.
Common clip types and their principal effects
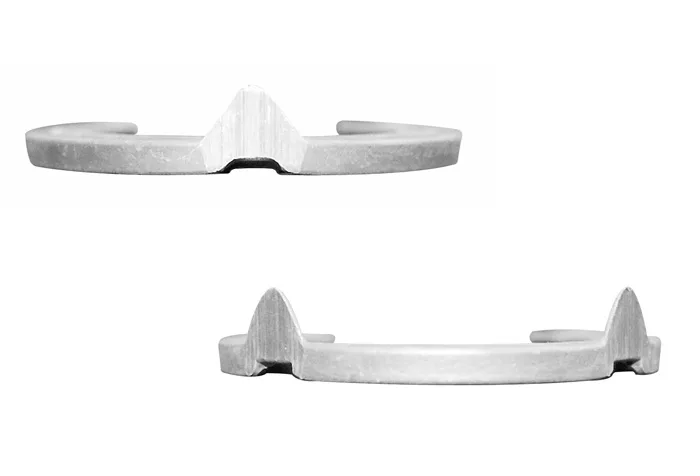
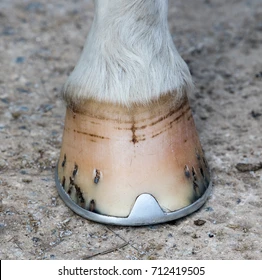
Toe clip (full or partial): a forward clip that cups the toe web of the wall. Good at preventing anterior (forward) migration and helping with correct break-over. Often used where the toe is long or at risk of over-loading the toe nails.
Side/quarter clips (medial, lateral, or bilateral): sit at the quarter region and are the most commonly used. They resist lateral migration and provide mediolateral stability — valuable for asymmetric gaits or when the hoof expands under load.
Double clips (toe + quarters or bilateral quarters): used when extra security is needed (heavy traffic, show/competition conditions, therapeutic shoes that must not move).
Advantages and disadvantages
Advantages
Improved shoe retention: less tendency for the shoe to gap or rotate.
Reduced nail stress: fewer nail failures and less tearing of the wall.
Control of break-over and stability: clip placement can be part of the corrective plan.
Predictable shoe position: useful for repeat corrective work or prosthetic/therapeutic shoes.
Disadvantages / risks
Stress concentration: if the wall is thin, shelly or cracked, clips can act as a lever and accelerate failure if badly placed.
Catching hazard: protruding clips (not flush) can catch on bedding, gates or cause injury.
False security: clips won’t compensate for a poorly shaped shoe, incorrect fit, or bad trimming — they can hide those problems.
Aesthetic / competition rules: some competitions restrict obvious clip types or require them to be filed smooth.
Fitting clips: lying against the hoof wall vs cut in (flush)
There is some professional debate on the merits of flush fitting or proud off the wall for correct clip fitting. Both methods are valid — the difference is one of trade off.
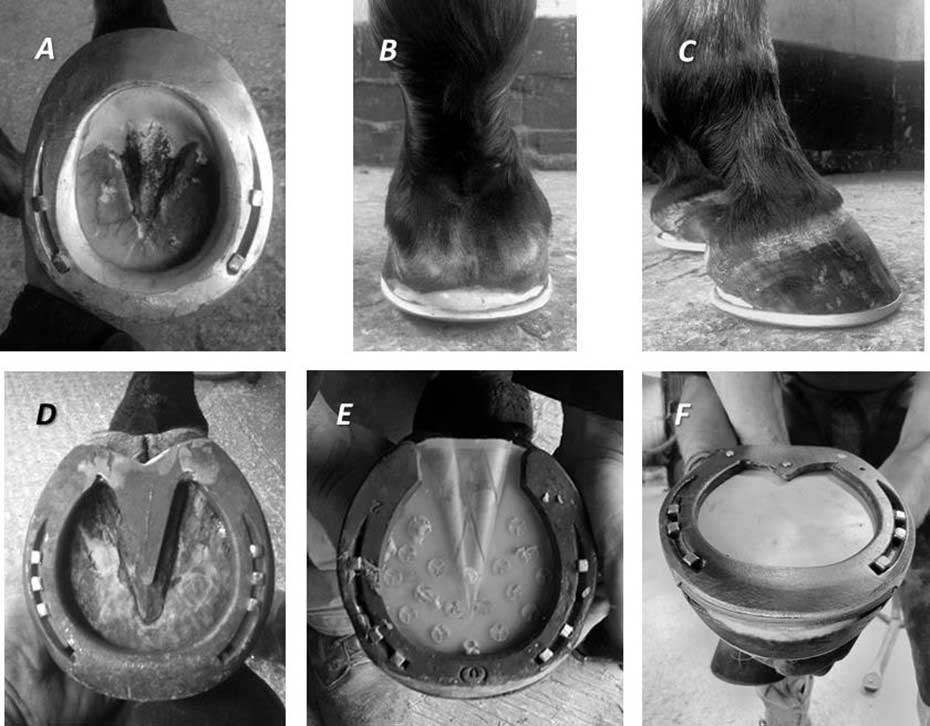
A — Clip laid on the hoof wall (sits proud)
What it is: the clip rests on the external face of the hoof wall — it does not require cutting away horn to accept it.

Side clips fitted flat against or proud off the outer wall.
Pros
Simpler and faster to fit.
Engages a larger area of horn — can give stronger mechanical purchase when the wall is robust.
Easier to shape and adjust after setting the shoe.
Cons
Increased snagging risk; can catch bedding or tack.
Acts as a lever against the outer horn: on thin/brittle walls it can lever and cause flares or chipping.
More prominent visually.
When to favour it
Horn is thick, strong and healthy.
Horse works on non-abrasive surfaces (arena work, groomed tracks).
Shoe will be inspected regularly and trimmed/replaced on a short cycle.
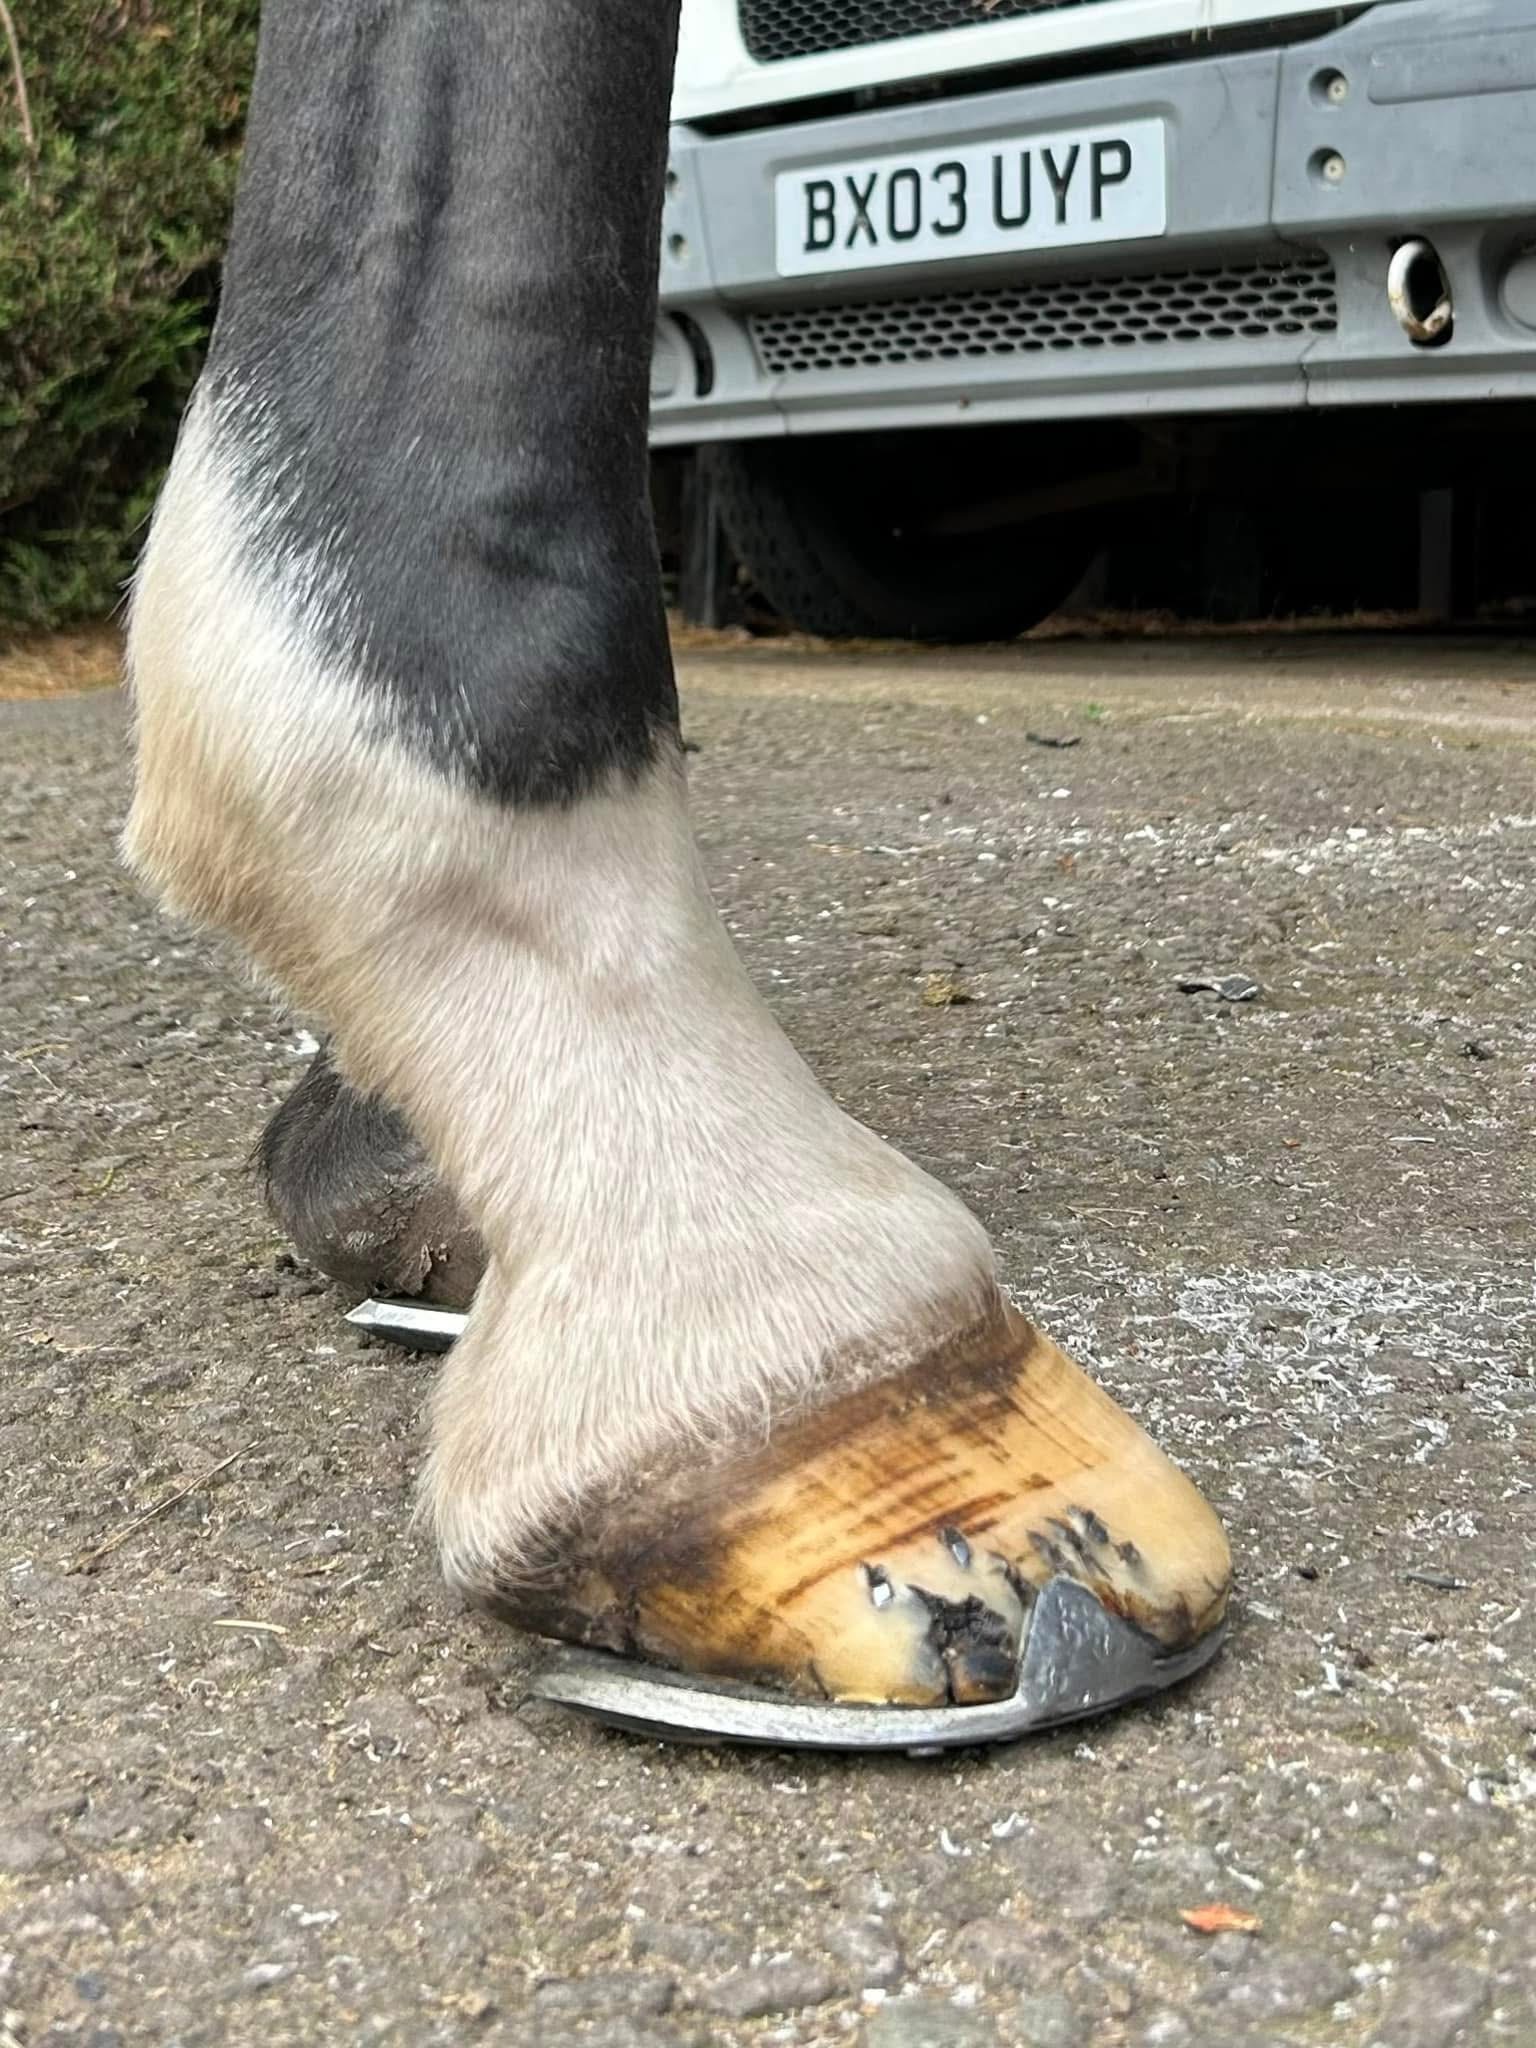
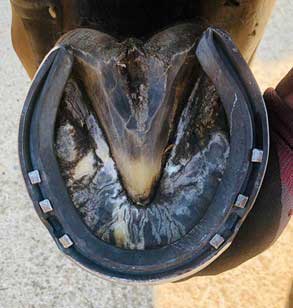
B — Clip cut in to fit flush / inlayed
What it is: a small portion of the hoof wall is pared away so the clip sits level with the hoof wall surface.
Toe clip cut into the DHW so as to fit flush with the wall.
Pros
Lower profile — less chance of catching or snagging.
Reduces bending moment on the outer horn because the clip bears closer to the wall’s neutral plane.
Cleaner appearance and often preferred in horses that turnout, compete, or wear protective boots.
Cons
Requires more skilled trimming and precision to avoid undermining the wall.
Removal of horn reduces the cross-sectional strength locally — if overdone, this can weaken the wall.
Takes longer to fit correctly.
When to favour it
Thin, shelly or sensitive walls where you want to avoid levering action.
Horses that encounter rough ground, turnout or intensive riding where snags are likely.
When the farrier wants a neat, low-profile finish for aesthetics or rules compliance.
A considered opinion: how to choose the clip style and fitting method
Below we offer pragmatic guidance — combine these with your clinical judgement and the horse’s history.
Hoof conformation
Broad, thick-walled hooves with healthy horn: quarter clips laid on the wall provide excellent retention and are low risk. Full toe clips can be used where break-over control is required.
Thin, shelly, flaky or brittle walls: prefer cut-in (flush) clips, or smaller half-clips. The aim is to minimise levering on the outer horn and avoid creating a catch point that will tear out.
Underrun or collapsed heels: avoid big toe clips that can increase leverage at the toe; consider medial or lateral quarter clips that support the shoe without stressing the toe horn.
Long, low toes: toe clips help control forward migration and break-over but only after the toe has been appropriately shortened and trimmed; clips are adjuncts, not substitutes for correction.
Front shoe side clips laid on flat to the wall and if the type suitable for weak horn and feet displaying long toe low under run heel confirmation.
Asymmetric or pigeon-toed / splay conformation: selective placement (medial or lateral quarter clips) can improve mediolateral stability and reduce shoe rotation.
Hoof function and gait
High-impact athletes (eventers, show jumpers, racehorses): use robust clip strategies (often full quarter or combined clips) to minimise shoe loss during high loads. However, monitor closely for any wall damage and use flush clips where the walls are not robust.
Dressage/flatwork: low profile, neat solutions are preferred (flush clips or half-clips) to reduce snagging and to suit boots and aesthetic expectations.
Trail / hacking / turnout: flush clips reduce catch risk and therefore are often the better option.
Therapeutic shoeing or shoes with pads: clips are often essential to hold complex shoes; the clip style should prioritise secure retention while protecting compromised horn (flush placement where possible).
Clip selection size and style should account for the overall characteristics of the shoe type, fit and ancillaries
Shoeing cycle duration
Short cycles (4–5 weeks): clips can be more aggressive (laid on wall) because regular attention reduces the time for a small damage process to become a significant problem.
Long cycles (6–8+ weeks): favour conservative clip options and flush placement to reduce cumulative stress and the risk of wall chipping over time.
Irregular maintenance (turnout, lost shoes): opt for the lowest-risk profile — flush, small clips or none — and focus on improving trimming and fit to reduce dependence on clips.
Intended work regime (summary)
High intensity, short bursts, high speed: robust clips (but monitor wall health).
Continuous long-distance or rough ground: flush clips to reduce snagging and progressive damage.
Competition where appearance / rules matter: low profile (flush) or minimal clips; check governing body rules.
Horses with history of shoe loss: a considered increase in clip security (combined clips) but with attention to wall preservation — consider alternative retention methods (adhesives, fullering patterns, or custom shoes) if the wall is very poor.
Common clip position and style for both general riding horses and those performing fast multi terrain footing
Practical fitting tips (technique & cautions)
Always fit the shoe to the foot first — a well-fitted shoe reduces the need for heavy clips.
When cutting in for flush clips, remove only the minimal horn required so the clip sits level — do not undermine the structural integrity.
Chamfer and round clip edges that sit proud to reduce catching.
If wall quality is marginal, consider combining a small clip with adhesive or use a thin steel or composite clip profile that spreads load.
Document clip placement and the reason for it in your shoeing notes — this helps spot patterns over cycles.
Final, practical rule-of-thumb checklist
If the wall is strong and the horse works on prepared surfaces: favour laid quarter clips for retention.
If the wall is thin, shelly or the horse is turned out / works on rough ground: favour flush (cut-in) small clipsor half-clips.
For break-over control use toe clips or a toe clip + quarter clip combination, but only after trimming corrective geometry.
For long shoeing intervals, be conservative with clip size and placement; less profile is safer.
Always treat clips as part of a system — shoe fit, trimming, nails, and the horse’s workload must all be considered.
Closing thought
Clips are neither a panacea nor a cosmetic extra — they are a mechanical solution that must match the quality of the horn, the function of the foot, and the horse’s workload. The best farriery decision is rarely a single “right” answer; it’s the one that balances retention with horn preservation and that changes if the horse’s foot or work changes. When in doubt, err on the side of protecting the wall (smaller or flush clips) and improving fit and trim rather than simply increasing clip size.